Installing a glass insert into your door is easy and does not require anything more than a good jigsaw, a drill, 5/8 drill bit, a tape measure and or square ruler, caulk, pencil and screw driver. You don't need to be a woodworker or master craftsman to do this. You can take any flush panel door; wood, fiber glass, metal, new or used and add a glass insert to turn it into something unique and special.

First step is using the frame of the glass insert to draw your cut line on the door. There are two sides of each frame, make sure the outside of the frame is facing up and that you are tracing the smaller side. The door shown here is a fiber glass door I picked up at my local lumber supply company for $186. Measure once, measure twice and what the heck measure a third time. Make sure it is square, centered and where you want your glass to go.
Next, drill holes in the corners. Make sure the holes are big enough for your jigzaw blade to fit into. Don't drill too close to the cut line, use your jigzaw to make the close cuts.
Tape the outside of the cut line. This will protect the door from the jigsaw. Avoid any scratches or marks. Also, make sure you use painter's tape so you don't leave any gummy tape residue.

Using a good jigsaw with a blade long enough to go through a 1 3/4" door, cut along the pencil out line of your frame.

Carefully remove the cut out. When making your final cuts be sure to hold up the cut out with either tape or a second pair of hands. Don't let it fall out. It will tear the edge of the facing.
Insert one side of the frame. Caulk the frame onto the door. Make sure you have plenty of caulk around the frame, let it ooz out onto the door. This is important, you don't want any moisture to get in between the frame and the door. Install the outside frame first, you will know it is the outside since it does not have any predrilled screw holes.
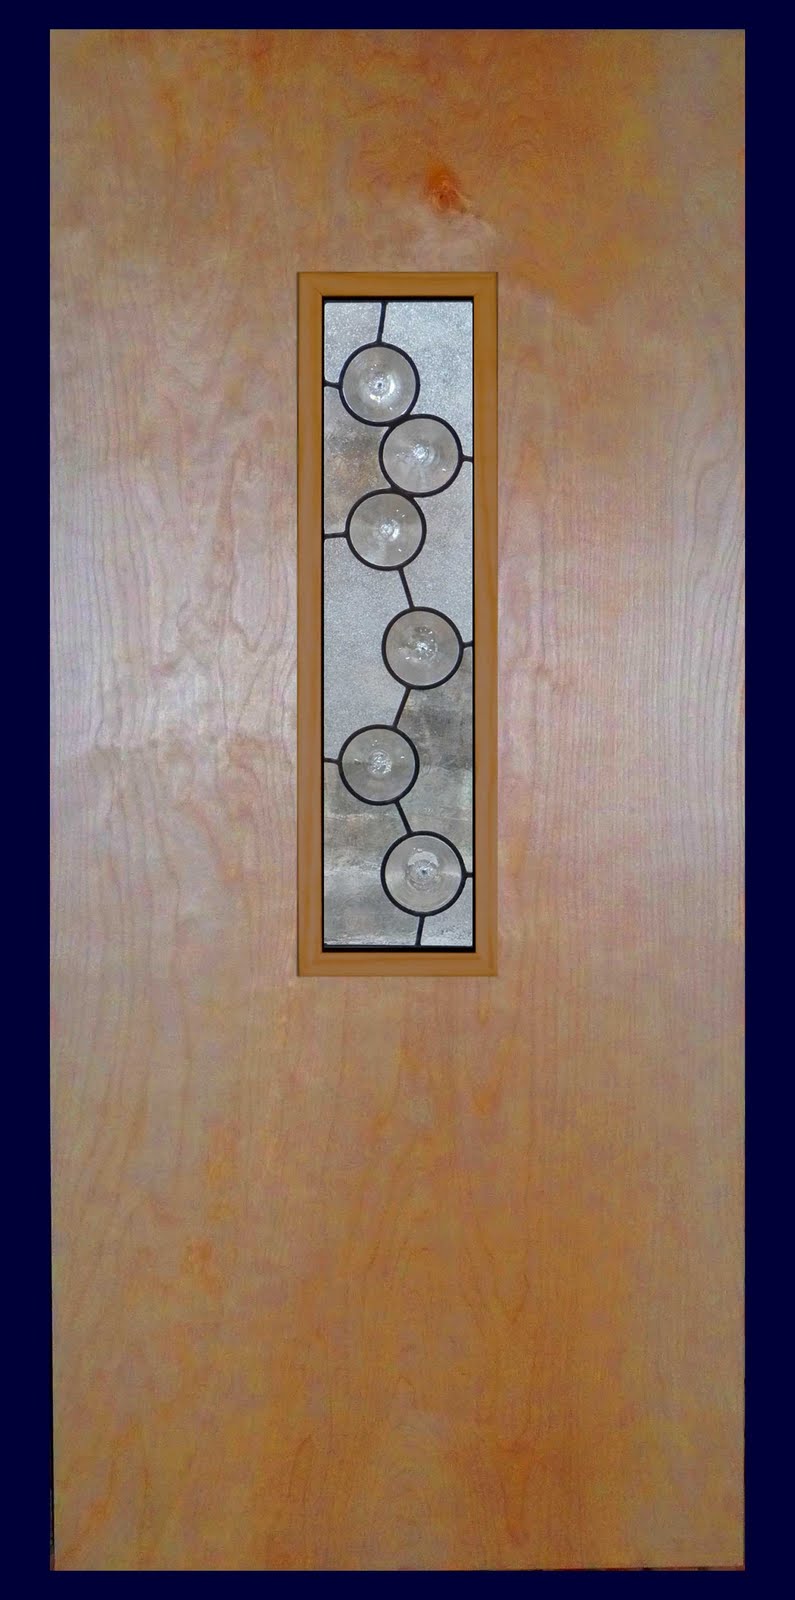
Paint, stain, seal your door. Install the glass, again use caulk to secure the glass into the frame. Screw on the inside frame and voila your door is done. A door you won't find anywhere else. It took me about two hours to complete this project.
 Check out the August 2010 edition of Traverse Magazine for a project we were apart of.
 Custom window we featured earlier in one of our posts.


 Using a good jigsaw with a blade long enough to go through a 1 3/4" door, cut along the pencil out line of your frame.
 Carefully remove the cut out. When making your final cuts be sure to hold up the cut out with either tape or a second pair of hands. Don't let it fall out. It will tear the edge of the facing.


